Beaded Ladybug Pendant Necklace Project
Kumihimo tutorials for braiding with beads
Free online instructions are on this page to make this beaded necklace project. Optionally, you can get the materials kit with everything you’ll need just below. You can also use this pattern with your own choice of pendants and threads.
Materials for this project
-
 Counterweight for Disk or Plate$2.95
 -
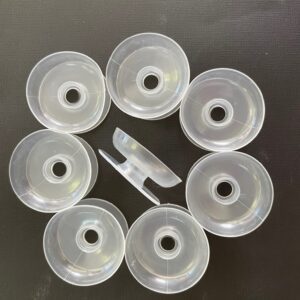 EZ-Bob Bobbins$3.90 – $45.54
 -
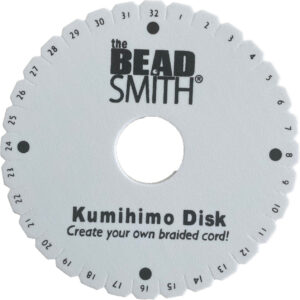 Kumihimo Braiding Disk$3.95 – $34.00
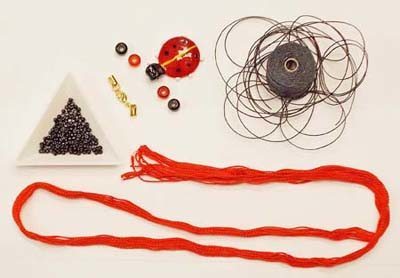
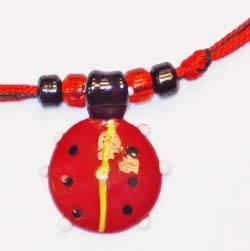
This lovely necklace is the basic spiral “kongo” braid with beads. Makes an 18″ necklace. Kit includes all materials and big eye needle for beading.
- level: INTERMEDIATE
- Pearl cotton and S-Lon threads for braiding
- Pendant, side beads, and seed beads
- Clasp, big eye needle, and instructions
To help with this project consider getting a disk, weight, and ez bobs
Learn to Bead during Kumihimo Braiding
GENERAL INSTRUCTIONS:This is a beaded version of a kongo-gumi, or spiral braid. (Click for instructions or making a basic spiral braid.)
It is a 2/8 beaded braid, meaning 2 out of 8 strands are beaded during the braiding process.
MATERIALS YOU NEED:
- #5 pearl cotton or craft thread in red
- S-Lon thread in black for beaded strands
- pendant,side beads, roughly 20 grams black 8/0 seed beads, red sewing thread
- a 4mm glue in clasp
TOOLS YOU NEED:
- braiding disk, braiding weight and 8 EZ bobs,
- big eye needle
- scissors, sewing needle, gel super glue
Cut 12 lengths of the pearl cotton – about a yard long for a 20-22″ necklace. Cut two length of the black S-lon thread 2 yards long each. Find the midway point of both thread types. Knot all the threads together just to one side of the midway point.

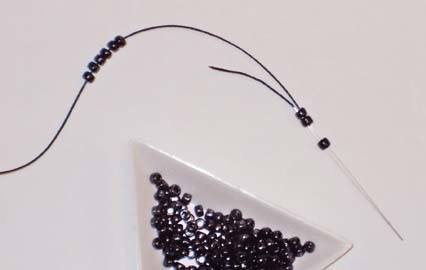
You will now mount the pendant and beads on the slightly longer side. Line up the ladybug pendant with the side beads. Using the big eye needle, thread 2-3 of the threads on the needle and pass through the beads.
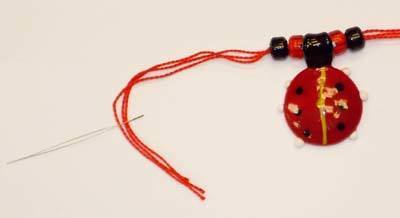
Repeat for the rest of the threads until the pendant and beads are mounted (right). Now you are ready to put the threads on the braiding disk.
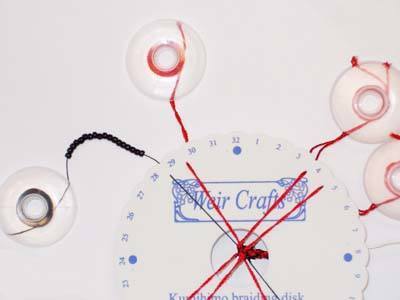
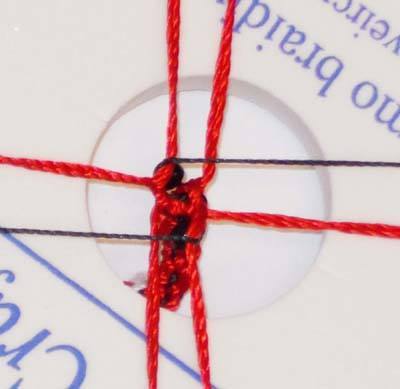
*** Place the threads on the disk as shown, 2 red threads to a slot. The two black S-Lon threads are crosswise each other as shown. The pendant and beads are just below the center hole. Roll the red thread pairs into the EZ bobs and clip the bobs closed.
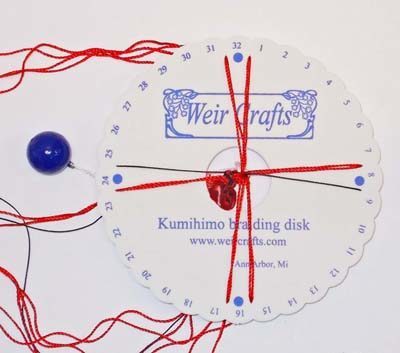
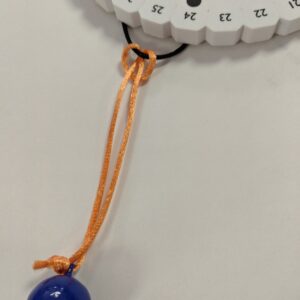
Attach the braiding weight by means of a larks head knot (half hitch) as shown, just below the knot and beads below the center hole. As you braid, slip the weight as you go up the braid to keep it within a few inches of the point of braiding. This knot can be easily loosened, moved up the braid, then snugged back down as the braid progresses.
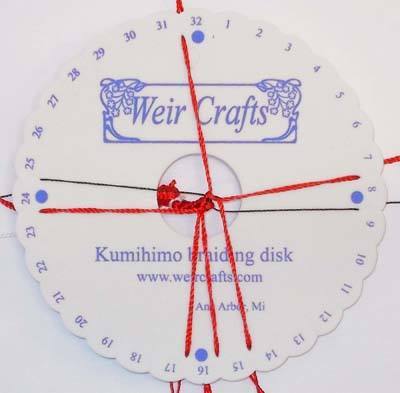
You will now add the seed beads on to the two black threads. With the big eye needle, thread a few dozen seed beads onto the black threads. It does not matter how many beads you thread on, as it is very easy as the braid progresses to add more beads as you need them.
Roll the S-Lon into the EZ bob and clip the bob closed. Repeat for the other beaded thread. Your disk should look like the picture at right.
When the threads are arranged around the disk as shown with the weight securing the threads under the disk and maintaining a uniform tension the braiding may begin.
BRAIDING: This is a simple braid with two exchanges that are repeated. Hold the disk so that one set of threads is vertical and the other horizontal. You will always work the vertical set of threads as follows:
STEP 1: Move the top right hand side thread DOWN to the right of the bottom thread.
STEP 2: Move the bottom left hand side top thread UP into the slot to the left of the top thread.
Notice that these threads have now shifted one slot counter clockwise.

Rotate the disk so that the other thread set is now vertical and repeat the two moves: TOP RIGHT DOWN.

BOTTOM LEFT UP.
Notice that these threads have now shifted one slot counter clockwise. It does not matter which way you rotate, or whether you move right down or left up first. you are working one set of threads, then the other set.

BEADING WHILE BRAIDING:
Braid step 1 and 2 several times before you begin adding the beads to allow the pendant and beads some room.
Now begin adding beads as follows: Each time you move a bead bearing thread across the disk, you will slide one bead up to the point of braiding and tuck it under the red threads it is crossing over, as shown.
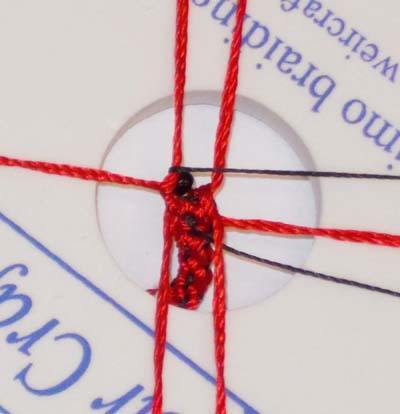
You’ll always cross both black threads at the same time, so repeat for the other black thread. Both beads are tucked in place. Tucking under is important, as it keeps the seed beads properly placed.
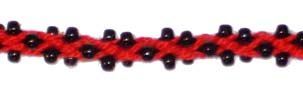
As you continue, you’ll see the braid beads line up as shown below.
REPEAT UNTIL THE BRAID REACHES HALF ITS DESIRED LENGTH FROM THE PENDANT.
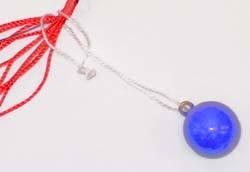
Braid another inch without beads – the clasp will glue better into the braid end without any beads on it. Remove the braid from the disk and wrap a piece of waste thread (shown in white) around the end to keep it from unraveling.

Now undo the knot on the other side of the beads. Mount this side on the disk, with the pendant and beads just below the center hole as for the first side.
Repeat from ***here to braid the second side.

To finish the braid ends for the glue in clasp, please continue at the finishing instructions page.
