Braiding Disk Instructions
Kumihimo tutorials for making round braids on a braiding disk
These pages are freely available instructions for making braids on the kumihimo disk and plate. These are instructions of common generic braids. A printed version of these instructions is also available on this page.
Text and pictures by None Redmond, a weaver and kumihimo braiding teacher.
See Other Braiding Styles here:
Kumihimo Products
-
 Braiding Disk Starter Set$12.95 – $17.95
 -
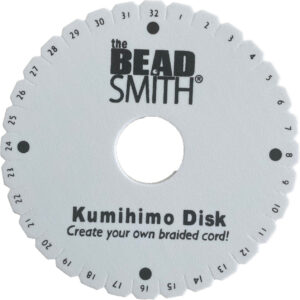 Kumihimo Braiding Disk$3.95 – $34.00
Spiral or Kongo-Gumi Braid
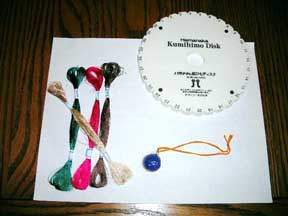
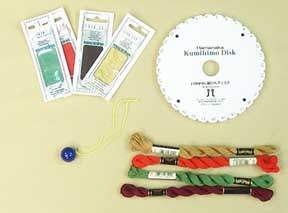
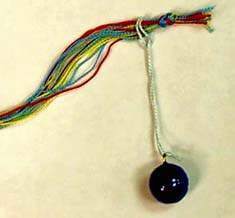
Here is a picture of what you need to make the spiral braid called in Japan, the Kongo-gumi. The traditional silk in 4 different colors is shown in the top picture.
You can also use a single strand of a thicker thread, such as silk embroidery floss or pearl cotton shown in the second picture. You can also use rattail, yarn or narrow ribbon. The possibilities are endless!
Weighting the thread where it hangs down in the center hole keeps the braid more even. You can buy a weight like the one pictured or use an old film canister filled with a few pennies.
To prepare the threads, cut 4 lengths about a yard long of each color (16 total), and knot them all together at one end. Attach the weight next to the knot by means of a larks head knot (a half hitch) as shown in the next picture. As you braid, slip the weight as you go up the braid to keep it within a few inches of the point of braiding.
The Lark’s Head knot (half hitch) is shown securing the knotted end of the threads. This knot can be easily loosened, moved up the braid, then snugged back down as the braid progresses.
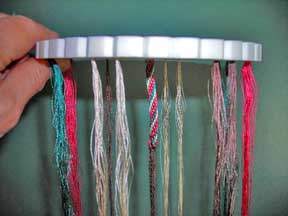
The weight hangs below the central hole and the threads are inserted into the slots around the edge of the disk as shown in this picture. Each pair of threads in a given color are opposite one another across the disk
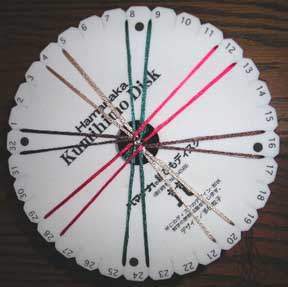
You may start with whatever color you choose but for illustration purposes I started with the brown. Holding the disk so that the four brown threads were in a north – south direction I moved the north thread on the right down to the right of the 2 brown threads at the south (RIGHT upper thread DOWN).
The brown thread at the south on the extreme left of the three brown threads there is now moved to the north and placed in the slit to the left of the single brown thread there (LEFT lower thread UP). This completes the first move.
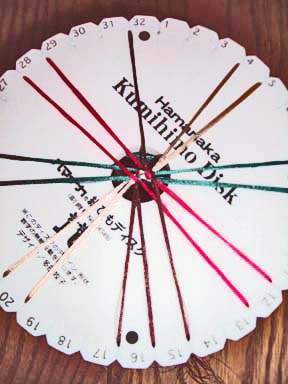
The disk is then rotated counter clockwise for the beige threads to take the north – south position and the same exchange is performed with them.
North Right to South Right (RIGHT upper thread DOWN). South Left to North Left (LEFT lower thread UP).
Rotate the disk counter clockwise to the next color. Proceed to exchange each color in turn as you rotate around the disk. Keep repeating.
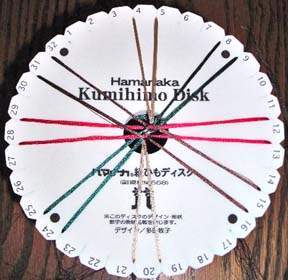
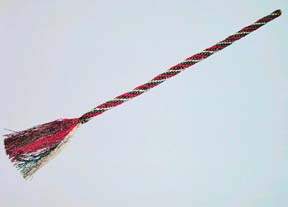
This picture shows the Kongo gumi in progress.
Note: braid is shown using the traditional silk threads, which are very fine, using 10 threads per slot.
Here is the finished braid.