Braiding Plate Instructions
Kumihimo tutorials for making flat braids on a braiding plate
These pages are freely available instructions for making braids on the kumihimo disk and plate. These are instructions of common generic braids. A printed version of these instructions is also available on this page.
Text and pictures by None Redmond, a weaver and kumihimo braiding teacher.
See Other Braiding Styles here:
Kumihimo Products
-
 Braiding Plate Starter Set$12.95 – $17.95
 -
 Kumihimo Braiding Plate$3.95 – $34.00
Basic Flat or Anda – Gumi Braid
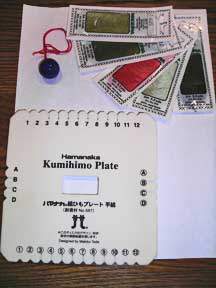
Here is a picture of what you need: silk or some other thread, the plate, and a weight. You can also use rattail, yarn or narrow ribbon.
Please choose five colors which change from darker to lighter or graduate through the color spectrum. Cut about a yard of each color.
Attach a braiding weight to the centers of the thread lengths with a Lark’s Head loop as shown. This end will hang below the central slit of the plate.
The picture shows how the Lark’s Head knot is used to secure the centre of the threads. The weight will hang below the central slit of the plate.
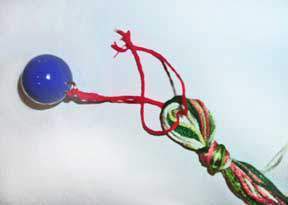
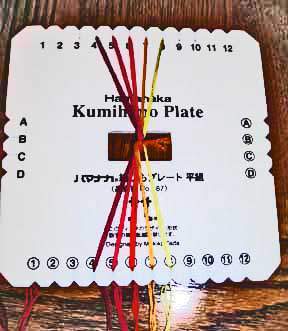
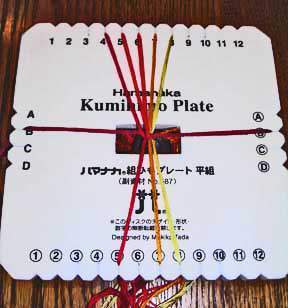
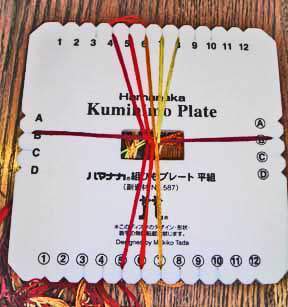
Arrange the five colors from darker to lighter as shown in this photo. This braid was made with three strands of each color of silk embroidery floss color but any other fibers on hand may be used for this first sample. You can see the lark’s head knot attached to the weight in the center hanging below the slot.
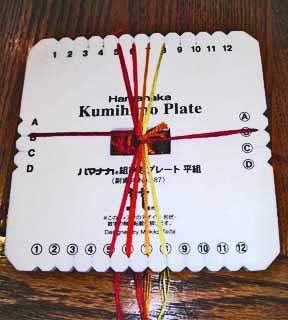
The dark thread on the extreme left at the north is moved to the west [4 – B] and the dark thread at the south is moved across the threads to a slit at the east [4 – (B)].
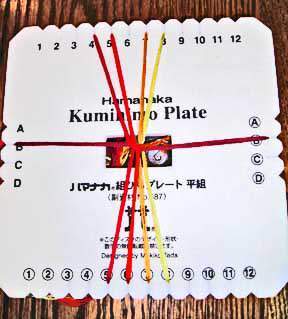
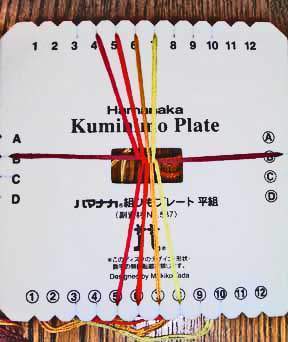
The thread at the south on the extreme left is now moved to the north on the left as shown below. [(5) – 4]
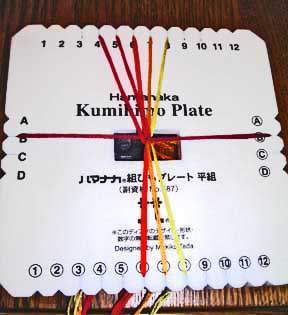
and the thread next to it at the north is moved to the south in the first thread’s place as shown below. [5 – (5)]
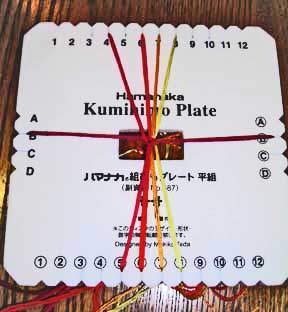
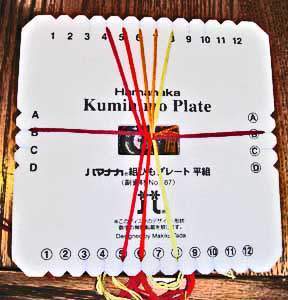
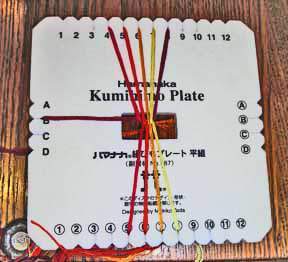
This photo shows the next move – the thread next door to the just arrived thread at the south is moved to the north into the empty slit just vacated. [(6) – 5]
and the thread next door to that one in the north is moved into the empty slit at the south.[6 – (6)]
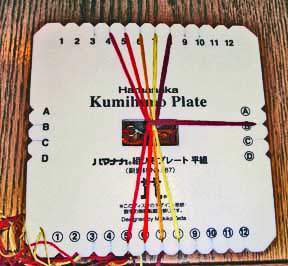
These moves continue, south to north, north to south as shown in the following pictures.
(7) – 6, 7 – (7).
(8) – 7, 8 – (8).
(8) – 7, 8 – (8).
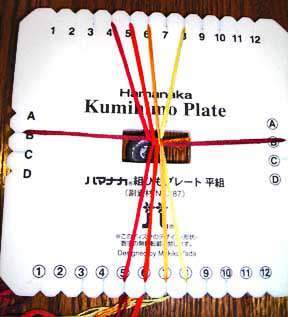
The thread at the east moves up to the north at the extreme right of the row of threads …..
and the thread at the west moves across the threads to settle in the slit just vacated at the east (B) – 8 and B – (B).
This is the next move showing that the thread at the north on the extreme left of the line of threads has been moved to the westerly position so that now this set up is the same as the one at the beginning of the braiding. [4 – B] The moves described are repeated and it will be seen that there is a cycle of 10 moves before the configuration returns to the original.

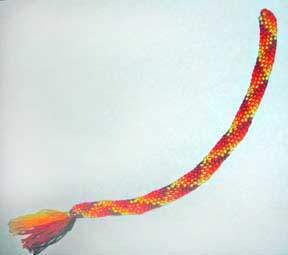
Here is the completed Anda Gumi. It will be seen during the braiding that the braid emerges at an angle. This observation leads directly to the next braid which is the zig zag.